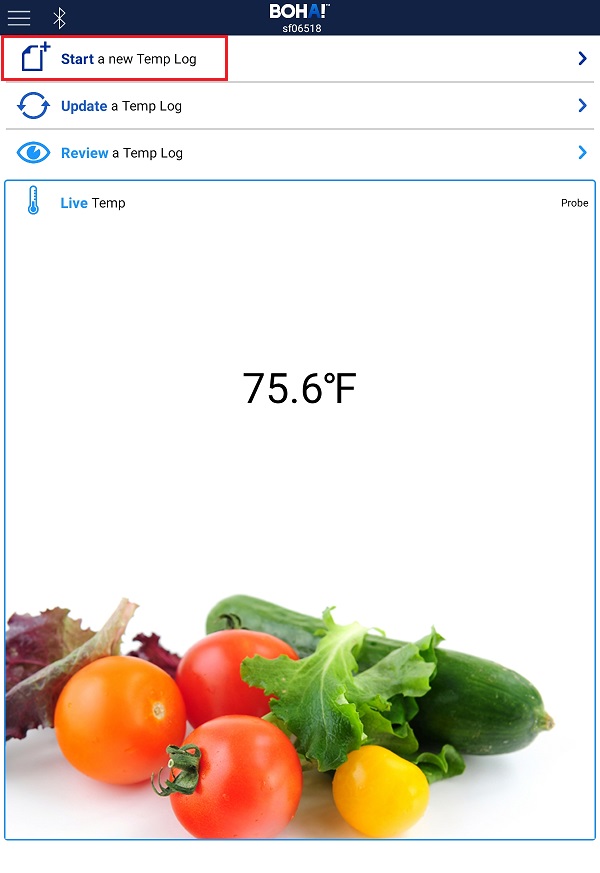
In order to take Food Temperatures, first, tap on Start a new Temp Log
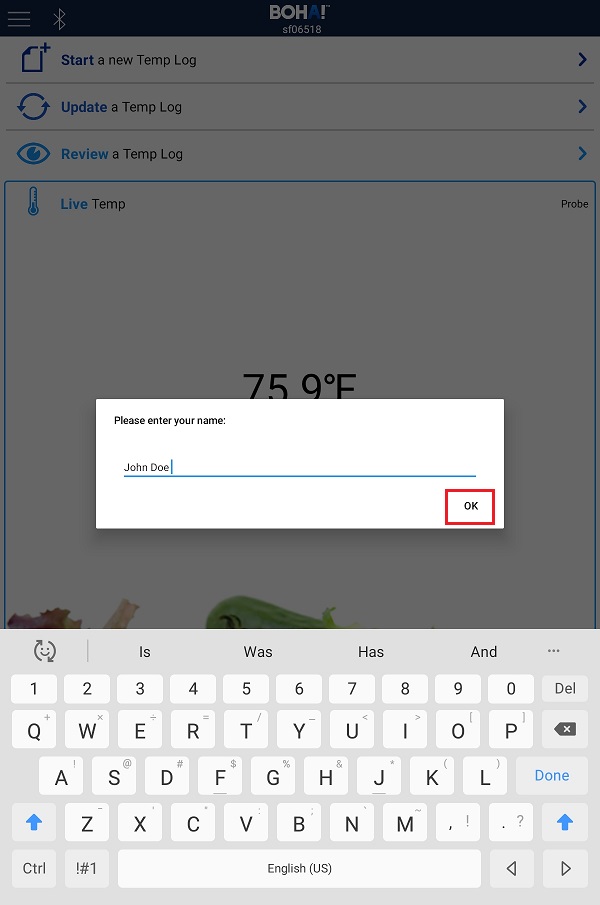
If asked to enter your name, enter your name, then tap on OK.
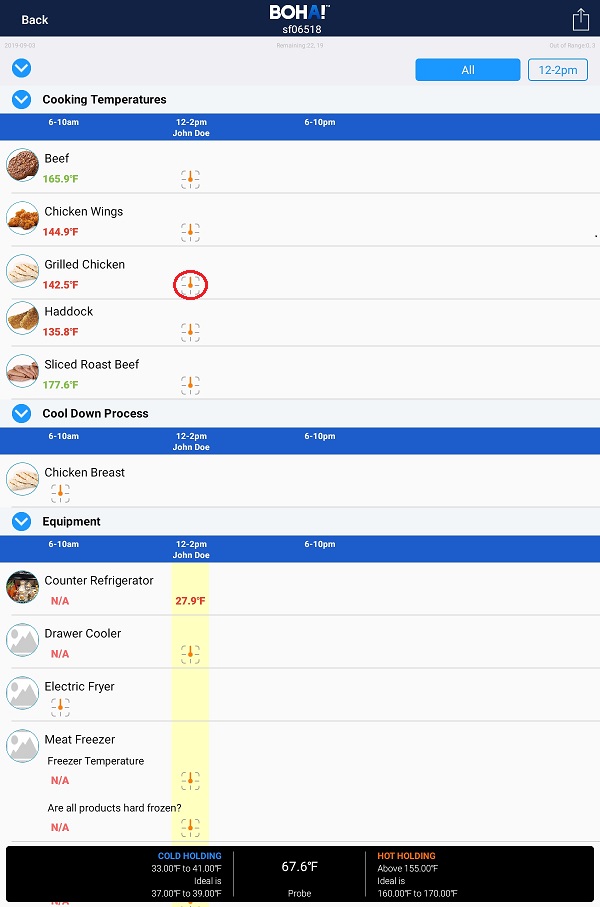
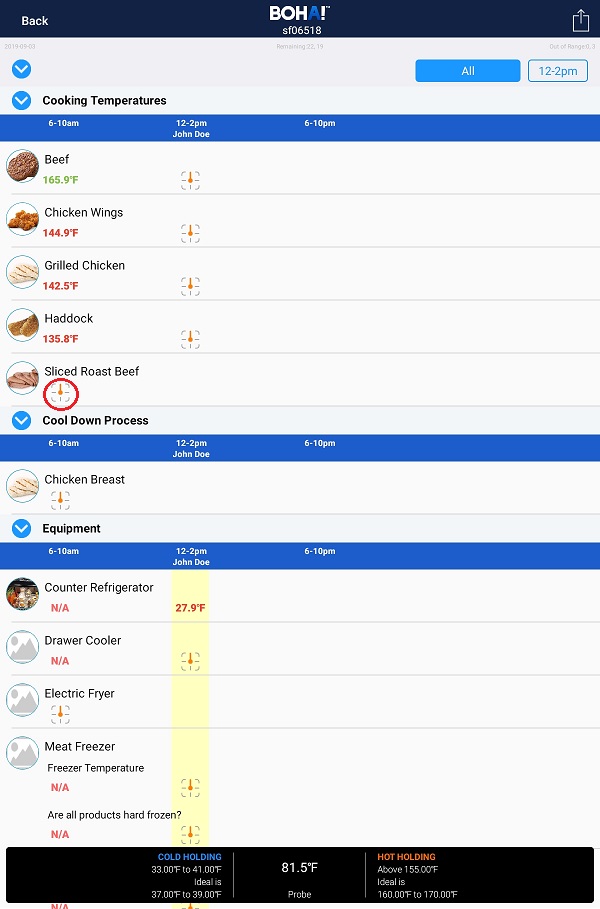
For the product that you would like to take the Temperature for, tap on the appropriate Measurement icon under the appropriate Measurement Time Frame. For example, in this case, we would like to take the Temperature for Sliced Roast Beef for the Time Frame of 6-10am, so we will need to tap on the Measurement icon under the 6-10am Time Frame column for Sliced Roast Beef.
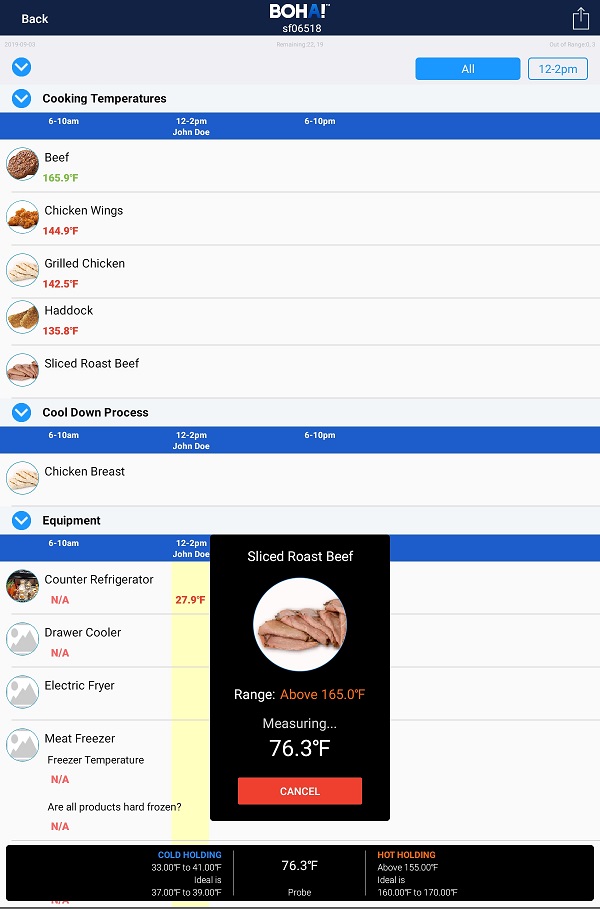
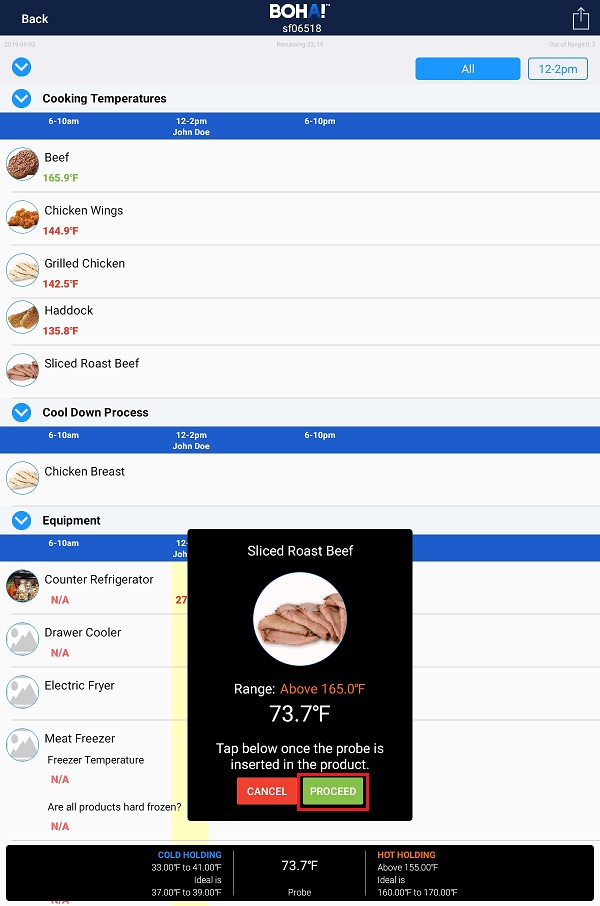
After tapping on the Measurement icon, the Cooper Atkins Blue2 Temperature Probe will begin measuring the Temperature. Make sure to insert the Cooper Atkins Blue2 Temperature Probe into the product, so that you get an accurate Temperature. You will see a message indicating that the Cooper Atkins Blue2 Temperature Probe is measuring the temperature. NOTE: If the Cooper Atkins Blue2 Temperature Probe is not inserted into the product, you will get a message stating “Tap below once the probe is inserted in the product”. In this case, make sure the Cooper Atkins Blue2 Temperature Probe is inserted in the product, and then tap the Proceed button, and then it will begin measuring the temperature.
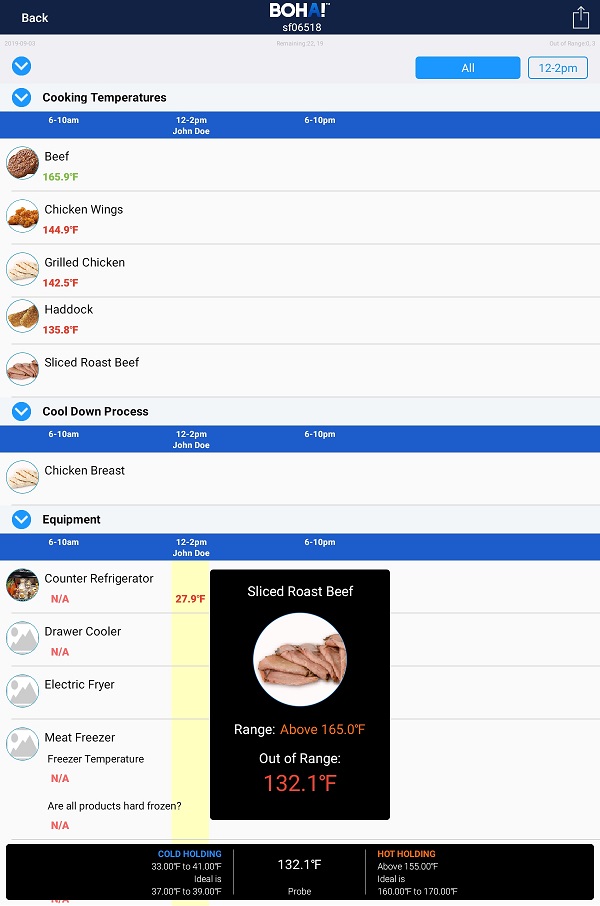
If the Temperature measured for the product is out of range, you will see the message below stating that the product is “Out of Range”.
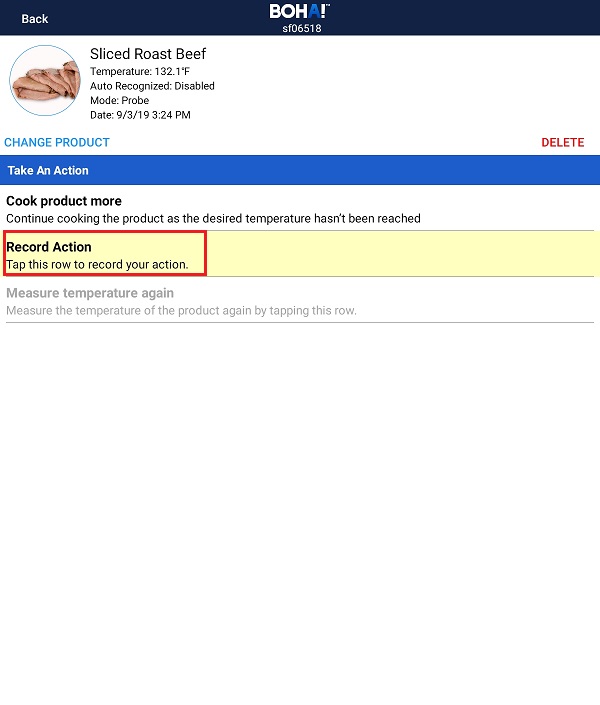
Since the product is out of range, you will be asked to take an action. Tap on Record Action, which will allow you to take a picture of the product.
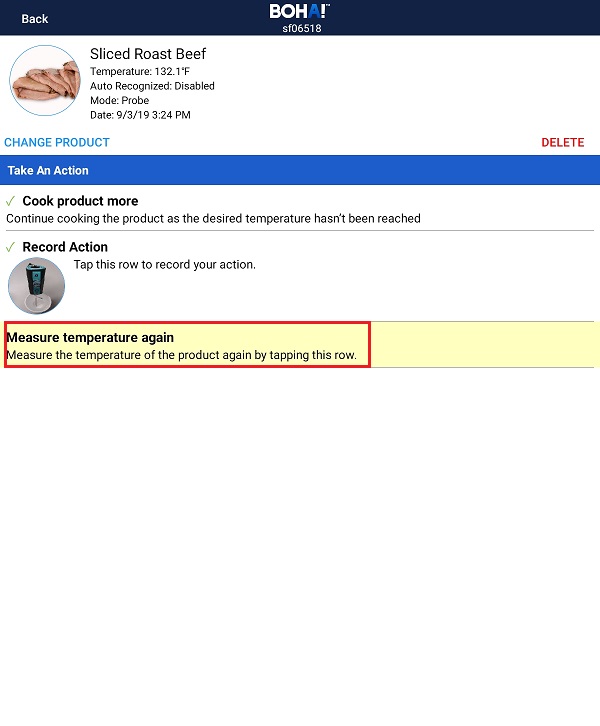
After you have taken a picture of the product, you will then be given the option to measure the temperature again. Tap on Measure temperature again.
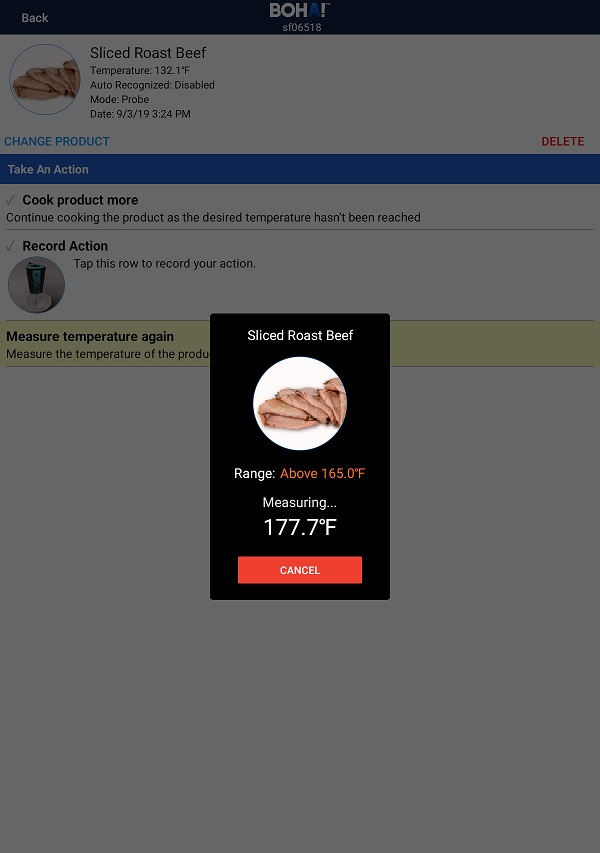
After tapping on Measure temperature again, the Cooper Atkins Blue2 Temperature Probe will begin measuring the Temperature. Make sure to insert the Cooper Atkins Blue2 Temperature Probe into the product, so that you get an accurate Temperature. You will see a message indicating that the Cooper Atkins Blue2 Temperature Probe is measuring the temperature.
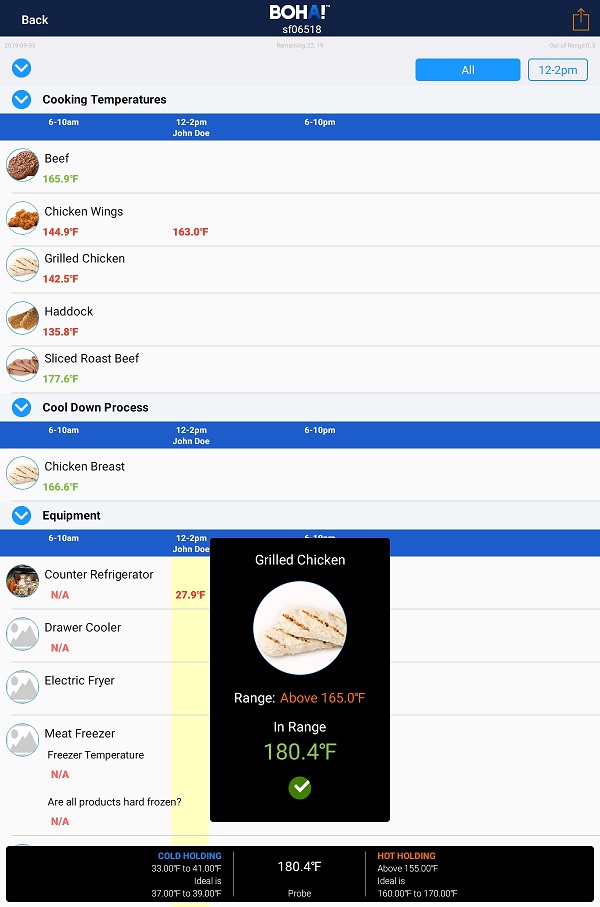
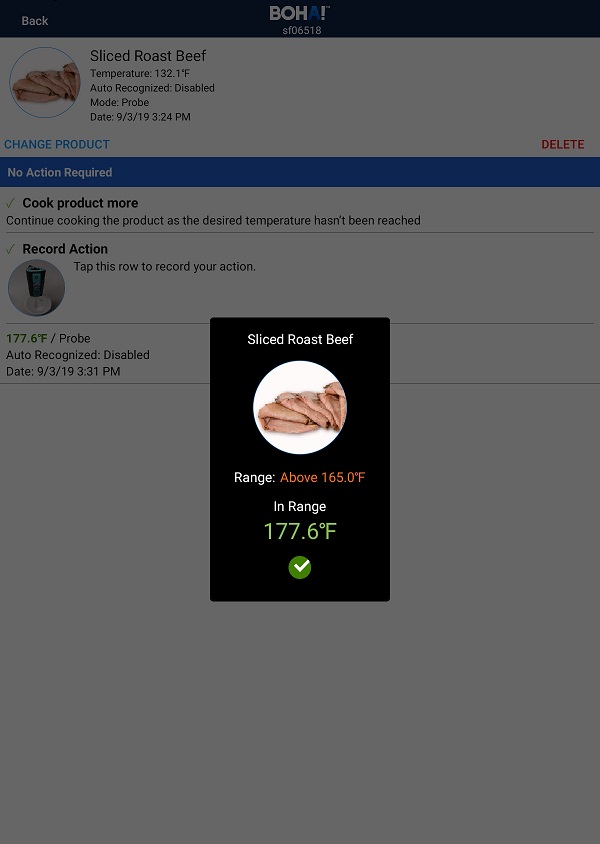
If the Temperature measured for the product is in range this time, you will then see the message below stating that the product is “In Range”.
NOTE: If you measure the temperature of a Product, and the temperature is in range on your first attempt, you will just receive a message indicating that the Product is “In Range”. For example, if we tap on the Measurement icon for Grilled Chicken under the 12-2pm Time Frame, and the temperature is in range on our first attempt, we will receive a message indicating that it is “In Range”, like below, and then the temperature will appear in Green next to the product under the appropriate Time Frame column.