Once your label templates have been been created, navigate to the Menu Manager by using the navigation panel on the left-hand side of the portal or clicking the Menu Manager icon
Add a new menu by clicking “Add” and selecting “Menu”
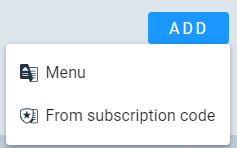
Name your menu and click “Add”
- If you would like the menu to use two languages, select the secondary language and enter the Secondary Menu Name
- If you would like the menu to be sorted alphabetically, turn the “Sort Items Alphabetically” slider to blue
- Your menu has now been created and you can start to add products and ingredients. This can be done manually or through exporting and importing the menu.
To Manually Create Menu Items
Click on the “Products” or “Ingredients” tab depending on the menu item you are adding.
- “Products” are generally any customer facing labels and “Ingredients” are typically prep items

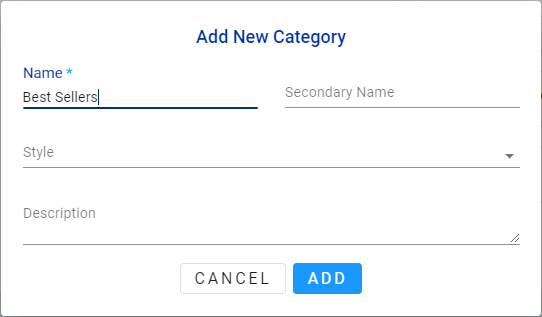
If you are adding an item to an existing category, select that category by clicking on the name. Otherwise, select “Add” then choose “Category”

Name your category. If you are using a secondary language, include the translation of the category name in the “Secondary Name” field
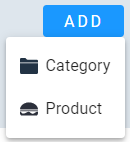
Once your category has been created you may start creating your “Products” (customer facing labels) or “Ingredients” (prep labels).
Click “Add” again and then select “Product” or “Ingredient” depending on which item you are currently adding
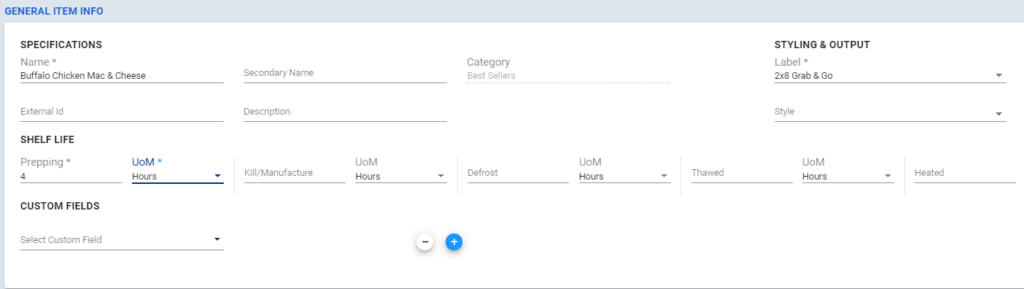
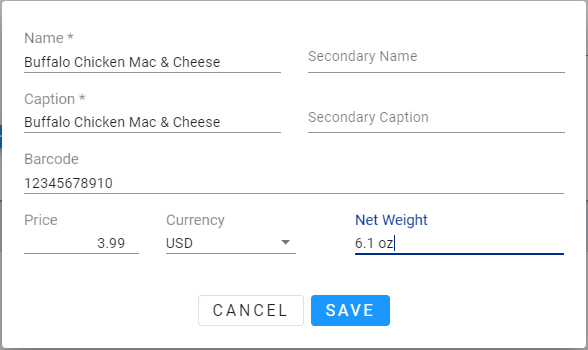
Enter the following information:
- Menu Item Name
- Caption
- Secondary Name/Caption (only if you are using a secondary language)
- Category (if not already selected)
- Label Template
- Shelf Life
- Shelf Life UoM
- Recipe (for Products only)
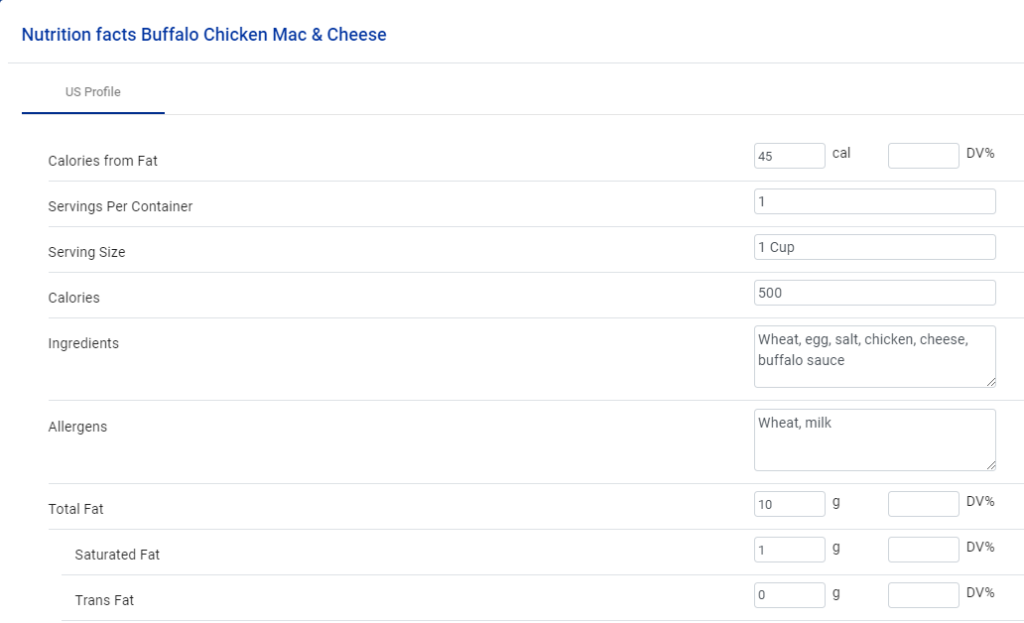
- Nutrition Facts (if desired)
Fields and their definitions can be found here
General Item Info:
Recipe:
Nutrition Facts:
Once you have finished filling out these elements, click “Save.” Your menu item now exists in either your “Products” or “Ingredients” list and needs to be assigned to a menu

To assign this item to your menu, return to the “Menus” tab and select the menu where you will be assigning the item by clicking on the menu name

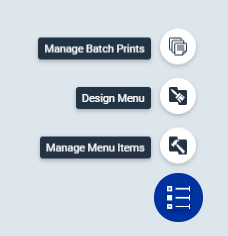
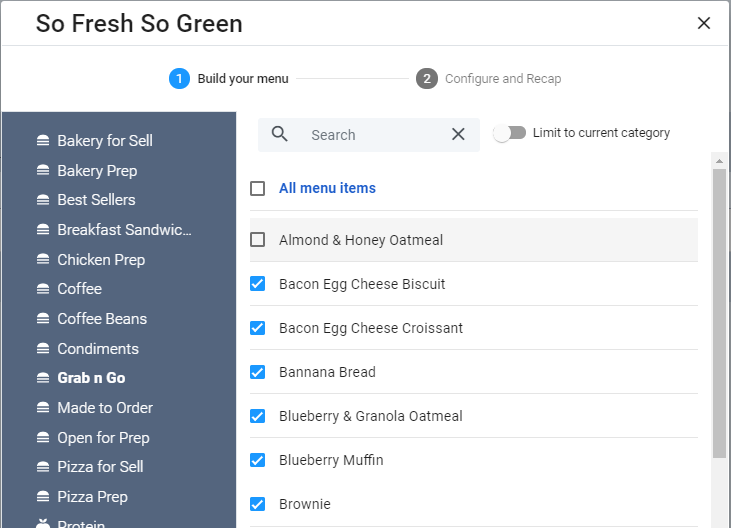
In the lower right corner, click the blue circle and select “Manage Menu Items”
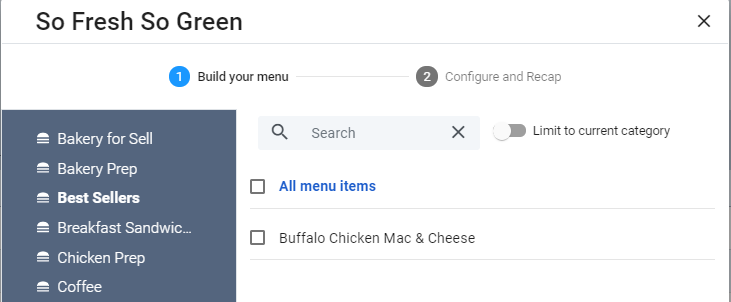
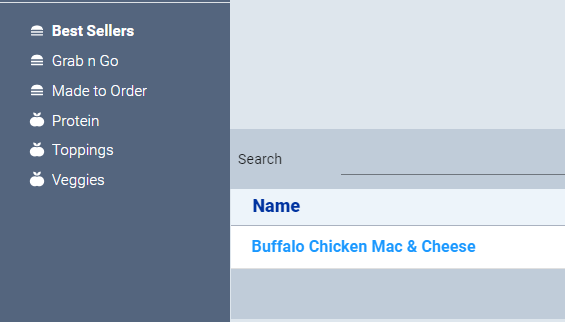
Here you will see any categories that you have created. By clicking on the categories you will be able to see the menu items that reside inside them.
Find the item(s) that you have created and check the box next to them to enable them on your menu. Once you have selected all items you wish to assign to your menu, click “Next”
- Buffalo Chicken Mac and Cheese has not been assigned to the menu yet:
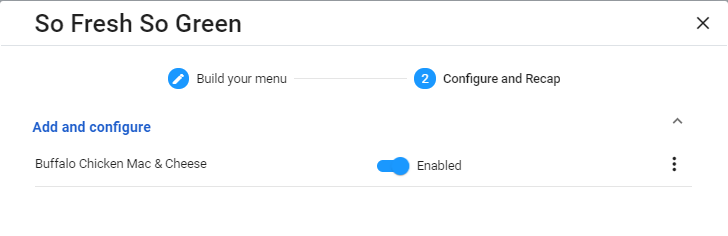
- Checking the box will assign this menu item to the menu:

After clicking “Next” review your changes before clicking “Save”
The item is now assigned to your menu and can be seen when looking in the different categories of your menu
To Assign Existing Menu Items
If you would like to use menu items that already exist in the portal, they will need to be assigned to a menu using the previous three steps of manually creating items
To assign an existing item to your menu, return to the “Menus” tab and select the menu where you will be assigning the item by clicking on the menu name

In the lower right corner, click the blue circle and select “Manage Menu Items”

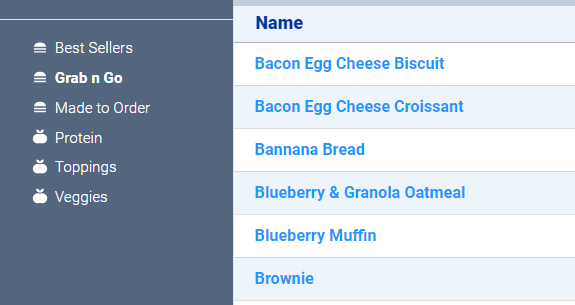
3. Here you will see any categories that have already been created. By clicking on the categories you will be able to see the menu items that reside inside them. Find the item(s) that you would like to add to your menu and check the box next to them to enable them on the menu. Once you have selected all items you wish to assign to your menu, click “Next”
- Uncheck an item to remove it from a menu (Almond & Honey Oatmeal) and check the box next to items you want to assign (Banana Bread and Brownie)
After clicking “Next” review your changes before clicking “Save”

The item is now assigned to your menu and can be seen when looking in the different categories of your menu
To Create Menu Items Using the Export/Import Feature
From the “Menus” tab of the Menu Manager, click the 3 dots next to your menu and select “Export”
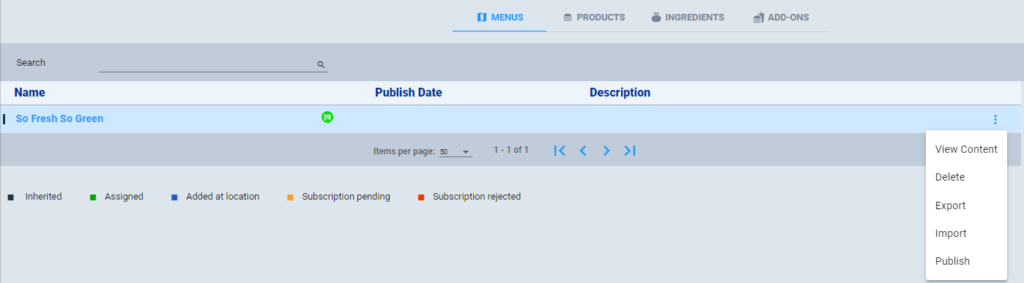
This will export all of the necessary information into an Excel spreadsheet including any items that have been assigned to your menu. If you have not added or assigned any menu items yet, the Menu spreadsheet will be blank. First, navigate to the “Category” tab and create your categories if you have not done so in the portal. If you have manually created categories before exporting, they will be available to you in the spreadsheet
- To create a category, assign it a unique category ID, enter a name (and a secondary name if using a second language) and Display order number
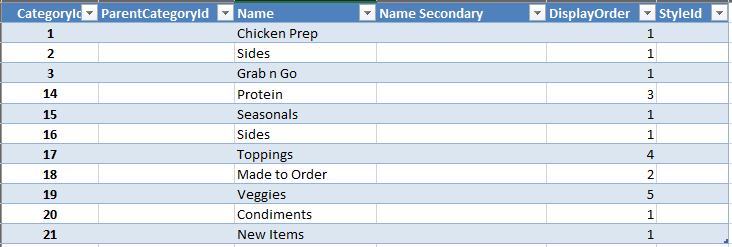
- To create a subcategory, assign the parent category’s ID to the child category in the ParentCategoryId field

Select the Menu tab to begin creating menu items

Enter the necessary information for your menu items
Required Information For Products
- Category ID
- Button ID
- Button Label
- Button Label Secondary (if applicable)
- Modifier Label
- Modifier Label Secondary (if applicable)
- Caption
- Caption Secondary (if applicable)
- Label ID
- Shelf Life
- Shelf Life UoM
Required Information for Ingredients
- Category ID
- Button Label
- Button Label Secondary (if applicable)
- Caption
- Caption Secondary (if applicable)
- Label ID
- Shelf Life
- Shelf Life UoM
All columns and their definitions can be found here
Below is an example of two ingredients (Tomato and Zucchini) and a Product (Almond & Honey Oatmeal)

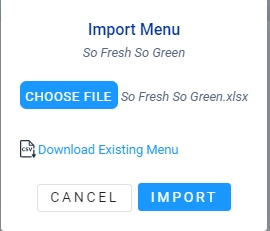
Once you have added all menu items, save the spreadsheet and navigate back to the BOHA! Portal Menu Manager. Click the 3 dots next to your menu and select “Import”

Select the menu file that you just saved and click “Import”
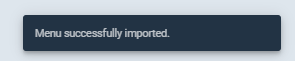
Once the menu has finished importing you will receive a notification at the bottom of the screen
You can now see the menu items you created by clicking on your menu and then selecting the category where the menu items reside