Checklist Manager
The BOHA! Control Center will now give you the ability to add, modify or delete Checklists as well as the underlying tasks associated with a checklist. Currently, there are two types of Checklists available in BOHA! – a Temp Checklist that is available from the BOHA! Temp app and an Ops Checklist that is available from BOHA! Ops. In this document we will cover Temp Checklists, Tasks and Workflows.
Temp Checklists
Temp Checklists are usually associated with your HACCP process and temperature checking of ingredients and prepared food items and monitoring of equipment temperatures. Temp checklists are divided into tasks and each of these tasks can be grouped into one of three task types: Ingredient, Equipment or Regular. A regular task is a non-temp-based task.
Before creating a task for a new ingredient, you will need to make sure that it is created in the Menu Manager section. Additionally, if you are creating a task for a new equipment type, you will need to create it in the Location Manager section. Once you have your ingredient or equipment type created you will navigate to the task or tasks that the ingredient is a part of and associate it with the task, including the workflow. Most tasks make use of a predefined workflows and these are available within the Workflow Templates page under the Settings main navigation.
Example: all meats (pork, beef, chicken) in your restaurant must be cooked to a minimum of 165 degrees Fahrenheit but not to exceed 180 degrees. Your Operations team will specify that the cooking task for meat have a specified range of 165-180 Fahrenheit where the item would be good and a corrective action if the item is below or above the specified range. So, we create a task for these ingredients and any other that have the same parameters, select a workflow that has the pre-defined parameters and corrective actions we have defined already and assign it.
Note: the workflow that fits the above parameter will have to be enabled for your use in the Settings / Workflow Templates page before it can be selected in the Task definition process.
TransAct will work with your Operations teams to setup your initial temp sessions, checklist, task and workflows and at that time will conduct the necessary trainings to explain how your checklist, tasks and how these make use of the included workflows. If at any time, an existing workflow does not meet your requirements, TransAct will work with your Operations team to define and enable a new workflow in your system. This new workflow would then be available for the required task(s) of which one or more ingredients or equipment are a part of.
If you are familiar with workflows and the input types available in BOHA! at this time, simply skip to the Adding a New Checklist and Task.
Workflows
Workflows are also a key component to Temp Checklist tasks.A workflow is a definition set or assigned to an item, whether it is an ingredient or equipment, that defines if the item meets a predefined standard (this would be set by your Operations teams) or requires the user to take an action to correct the state of the item.
- Ingredient Workflows: These are workflows that are assigned to ingredients such as chicken, beef, fish, etc.
- Equipment Workflows: These are workflows that are assigned to equipment such as fridge, freezer, oven, etc.
- Miscellaneous (Misc.) Workflows: These are workflows that can be assigned to general items and not specific to Ingredients or Equipment
Workflow templates are enabled for use in your account in the Settings Area, please see the section titled Settings – Workflow Templates. This will explain how to add or modify the templates that are already enabled for your account.
Input Types
Temperature Type
- It is a type used in workflows that depend on the temperature.
- There are configured by temp values (values: Range, Greater Than, Less Than, Unit of Measure)
- UOM is either Fahrenheit or Celsius
PPM(parts per million) Type
- It is a type used in workflows that depend on quantity
- Are configured by value(values: Range, Greater Than, Less Than)
- UOM is PPM
Yes/No Type
- It is a type used in workflows that requires Yes or No (true/false) values
- Y (Yes) is the expected value when using this input type. Please make sure to word your prompt in this manner.
- There are No UOM in this type
Text Type
- It is a type used to describe certain actions or message description on an item.
Duration Type
- It is a type that depends on predefined time set.
- Are configured in minutes and seconds(values: Range, Greater Than, Less Than, Unit of Measure)
- UOM is Minutes and Seconds
Expiry Date Type
- It is a type that depends on a predefined end date for an item
Adding or Modifying a New Checklist and Task
A checklist is a collection of tasks that may be performed during a specific time period.
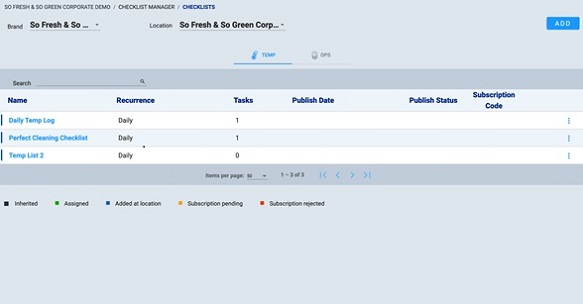
To add a checklist simply select Checklist Manager from the left-hand navigation.
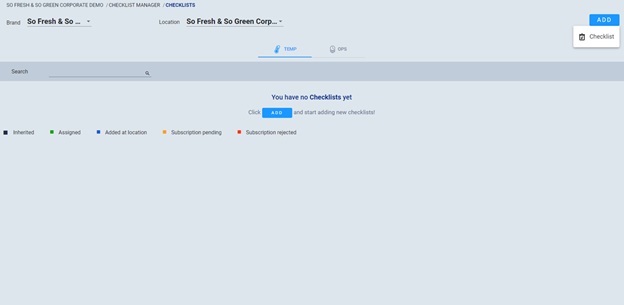
Then select Add on the upper right corner of the work area. If the checklist or task is specific to a point in your hierarchy or a location you use the Location option at the top of the work area to navigate to the desired point first.
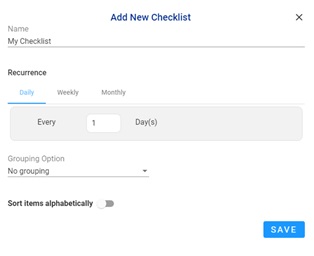
You’ll be able to name your checklist, define the occurrence and other checklist preferences:
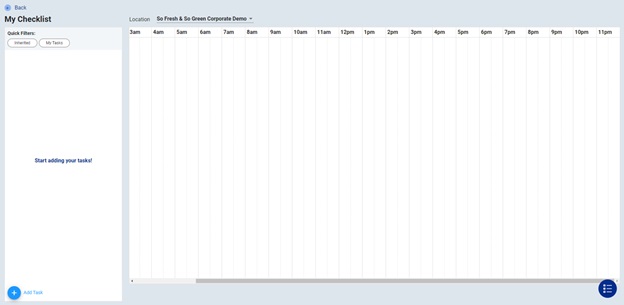
You will then be able to Add and Edit tasks within the Checklist. Please note the Add Task option on the lower left corner of the work area.
Note: in this document, we assume that your Operations team has already worked with your TransAct Implementation Team to configure temp sessions and workflows. That must be done prior to creating tasks. In addition, for ingredient tasks, you will need to make sure that the ingredient has been added to the menu manager first.
When adding a New Task, a window will pop-up in front of the Checklist work area that allows you to define the Task.
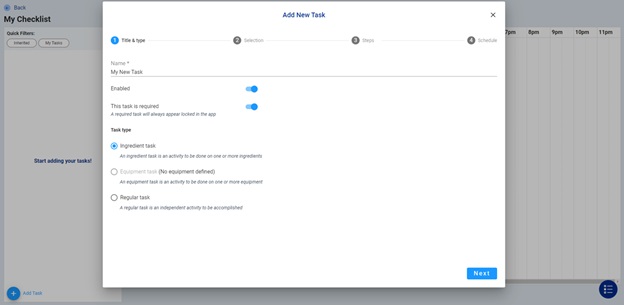
Please give your task a name, define whether it is Enabled for use and whether it is required. Note: a location user will not be able to remove/modify the task in the app.
Then select the Task type as described in the 1st New Task screen. Select Next.
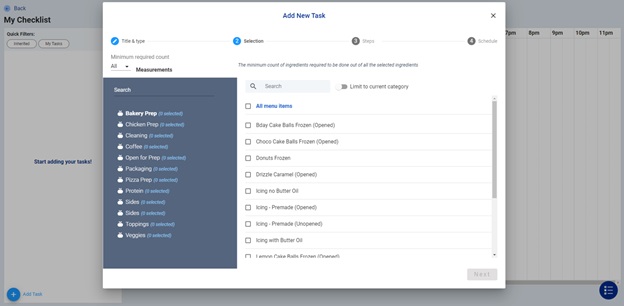
Now you are able to select the ingredients (if you’ve selected Ingredient task in screen 1) that this task applies to. Once this step is completed, click Next.
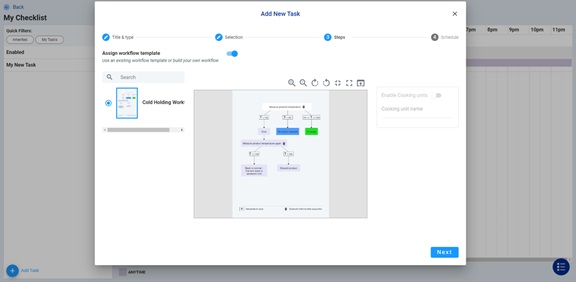
Now you have 2 choices, you can either Assign a Workflow Template OR define the steps to complete the task under Step One.
Assigning a Workflow Template
- Workflow templates are enabled for use in your account in the Settings Area, please see the section titled Settings – Workflow Templates. This will explain how to add or modify the templates that are already enabled for your account.
- For now, if you choose to enable the Assign workflow template you will be able to select the workflows that have been enabled for use in your tasks.
- TransAct will have worked closely with your Operations team to define each workflow, the appropriate ranges for your menu items, equipment types and miscellaneous steps.
Defining Steps
- If your task is a simple 2-step process, you are able to choose to define this process. Simply enter the Step title and description, choose the Input Type and other settings. To add a corrective step for if the item does not have a positive result, simply select Add step and provide additional guidance for your team members to perform the corrective action.
Finally, in Screen 4 of Add New Task, you will be able to configure how often the task should be executed. Once you are satisfied with all of your selections you can select Save.
During initial setup, your Operations team and TransAct will probably have grouped tasks within a checklist into separate sections. This ensures that when users access the app at your location it is easy to view the like items and navigate the list easily while completing their checklist tasks. See the sections, Designing Checklists for more information.
Settings – Workflow Templates
During the initial setup of your BOHA! account, TransAct works with your teams to define the various Workflows required for your Operations. BOHA! has over 30 standard workflows and there may even be additional custom ones created for you. To keep your work areas in Checklist Manager tidy, we have a separate area in the Settings menu to allow you to select only the specific workflows that are used by your account in Checklist Manager.
Accessing Workflow Templates in Settings
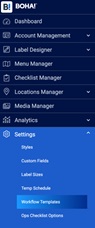
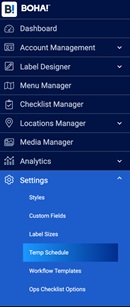
To access the entire workflow library simply go to Settings and select Workflow Templates.
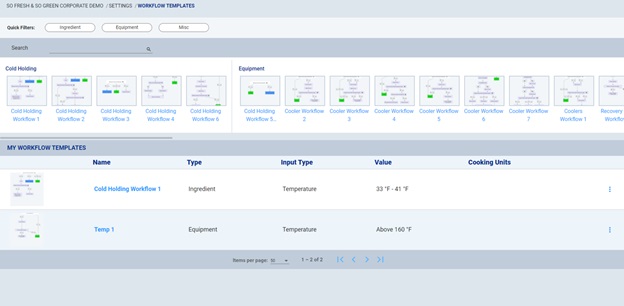
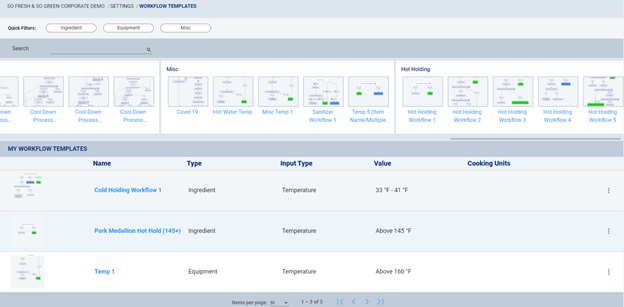
The Workflow Templates area is organized as follows:
- Quick Filters – allows you to filter workflows based on the three workflow types
- Search – allows you to search for a specific workflow
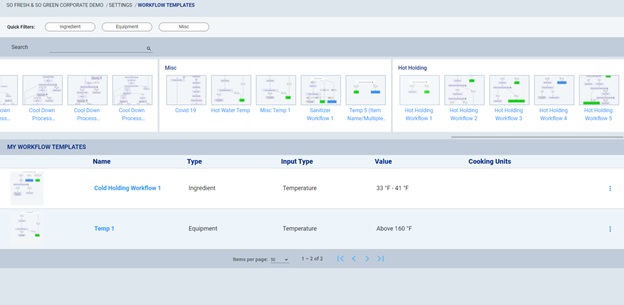
- Workflow Library – is organized by pre-determined categories, including: Equipment, Cold Holding, Cool Down, Cool Down Process and etc. Based on your account setup, you may have additional categories in your library.
- My Workflow Templates – This section contains the workflow templates that have been customized for use in your account and displayed in Checklist Manager.
It is possible to choose the same template from the Workflow Library and create multiple configured versions based on varied values and ranges required for your ingredients or equipment types. Note that the workflow itself, including corrective actions cannot be modified. Your Operations team would need to work with TransAct to create an entirely new workflow.
Customizing a Workflow Library Template For Use on Your Account
TransAct has over 30 standard workflows in addition to any that might have been created specifically for your BOHA! account. Each workflow contains a detailed diagram that shows the process workflow for either ingredient items, equipment or regular tasks. Select the workflow that best suits the new task you will be adding to your Operation and then define the parameters and corrective actions.
Note: If you want to edit a workflow that is already assigned to a task, you must either customize a new version of the workflow or unassign the workflow from all tasks that have been linked to it.
As an example, we have a new item on the menu: Pork Medallions that require a hot hold temperature that is higher than the other ingredients that use the Holding workflow already in My Workflow Templates. To get started:
- Navigate to the Hot Holding category in the Workflow library
- Select the Hot1 workflow and the Add Workflow screen will pop-up.
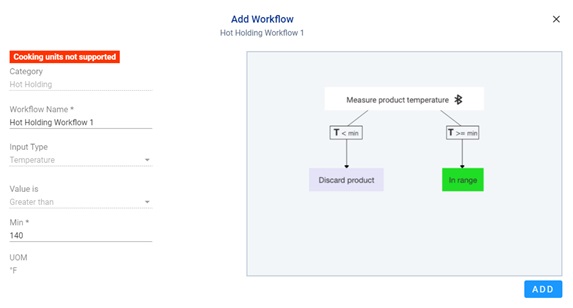
- Enter a name for the new Workflow to be added to your My Workflow Templates section and the minimum hot hold temperature for this item. In this case 145 for 145° note that in this account the unit of measure is Fahrenheit. We recommend giving a descriptive name to the workflow, so you understand the variables within the workflow when selecting it within the Task creation area. For example, “Pork Medallion Hot Hold (145+)
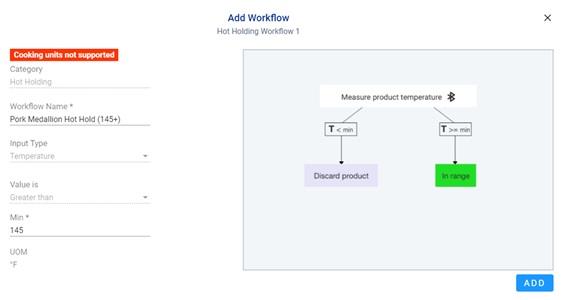
- Finally, select Add. Note that this workflow is now available in your My Workflow Templates section.
Now that your new Workflow is in the My Workflow Templates section, you can go to the Checklist Manager, go to the desired Checklist and add a new Task that is specifically for your Pork Medallions and select the Pork Medallion Hot Hold Workflow in step 3 of the New Task creation (see the section Adding or Modifying a New Checklist and Task for more info on creating a New Task).
Setting a Temp Schedule
Prior to creating Checklists and Tasks it is important to schedule the day and define which sessions exist throughout the day. Please be aware that you cannot overlap sessions over each other.
Accessing and Defining Temp Schedules
- Click on Settings from the Main Navigation and Select Temp Schedules.
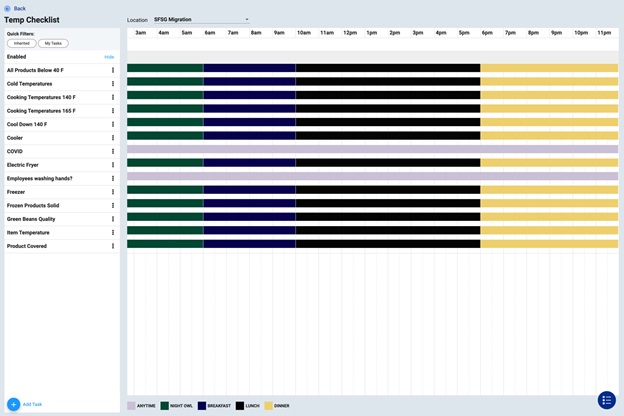
- You will then see your current Temp sessions by day of week and hour of the day.
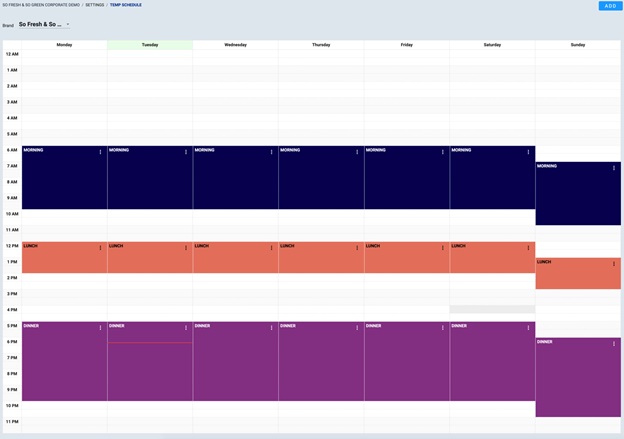
- To add a new Temp session to the Temp Schedule simply click Add on the top right area of the work area.

- Now fill in the Session Name, Description, Times and select whether it must be completed daily or which Days of the week it applies to and select Add.
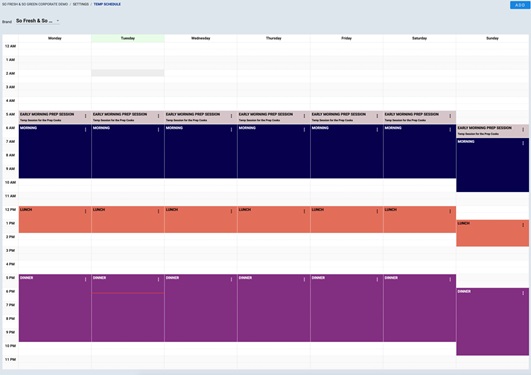
- Your new session will now be displayed on the Temp Schedule.
- You may now proceed to the Checklist Manager and link the desired Checklists and Tasks associated with this new Temp session.
Adding Equipment
Equipment is a key component to any Temp Log. Adding Equipment to your account is required to associate it with any new / existing task.
When first on-boarding your account, TransAct will work with your Operations team to define the equipment types that are specific to your company.
To add/edit equipment simply:
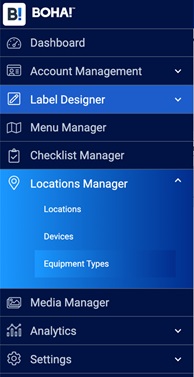
- Go to the Locations Manager and select Equipment Types.
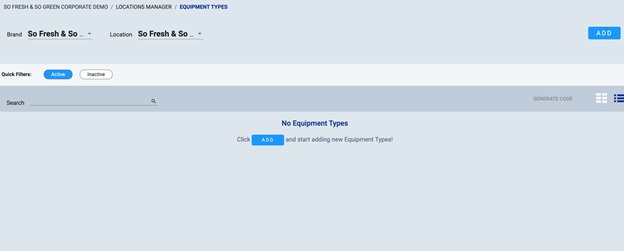
- Then select Add on the upper left corner of the work area.
Note: If you want to add this equipment type to a specific grouping or a specific location you can use the Location drop-down to navigate to the designer spot in your hierarchy.
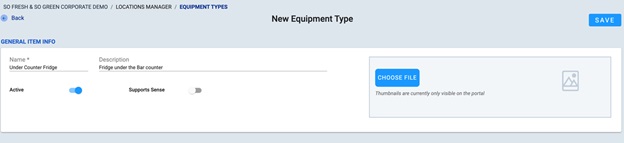
- Fill-in the required fields and if you wish you can also associate an image that will be displayed throughout the portal.
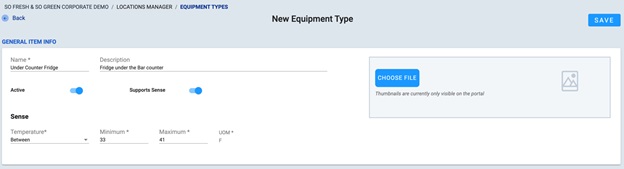
- If your Operations team has enabled BOHA! Sense, you are able to associate this equipment type with BOHA! Sense by enabling the Supports Sense toggle. This will enable additional fields for you to define the Temperature range the BOHA! Sense sensors will report on.
The new equipment type is now available for use when creating an Equipment task in a Temp Checklist.
Designing Checklists
Once your checklist has all the required tasks you can categorize these and set the display order in the BOHA! Temp app. To access the Design Checklist feature:
- Open Checklist Manager from the main navigation.
- Select the Checklist you would like to design / organize.

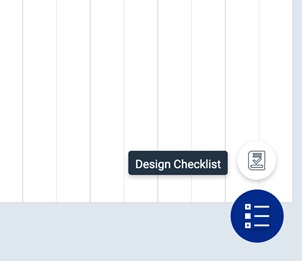
- Once you are in the Checklist, click on the Modify button on the lower right corner of the work area.
- Select Design Checklist.
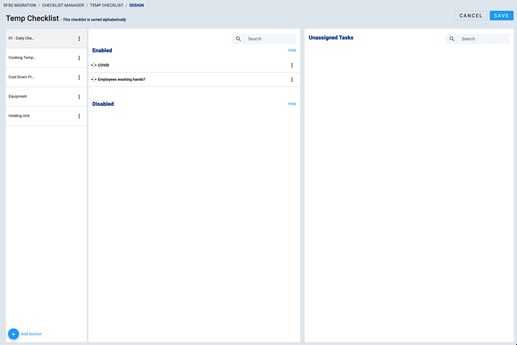
- You will then see the Design Checklist screen divided into three columns: Sections, Tasks associated with each section (Enabled or Disabled) and finally Unassigned Tasks.
- You can click on the Sections on the left-most column to view the various tasks that belong to each Section. To Unassign an item from a Section simply click on it in the 2nd column and drag it to the 3rd column Unassigned Tasks.
- To add a new section simply select the Add Section icon on the lower left corner of the 1st column.
- Once you are happy that each task is in its appropriate section select Save on the upper right-hand corner of the work area.
- Once you publish the Checklist, your items will be organized into this new categorization on the BOHA! Temp app at your location(s).
Checklist Display on the BOHA! apps
Please be aware that you can organize each checklist with their associated tasks separately on the BOHA! Control Center portal.
On the BOHA! apps all checklists will appear as a consolidated list of tasks based on the Sections you have defined in the Checklist designer.