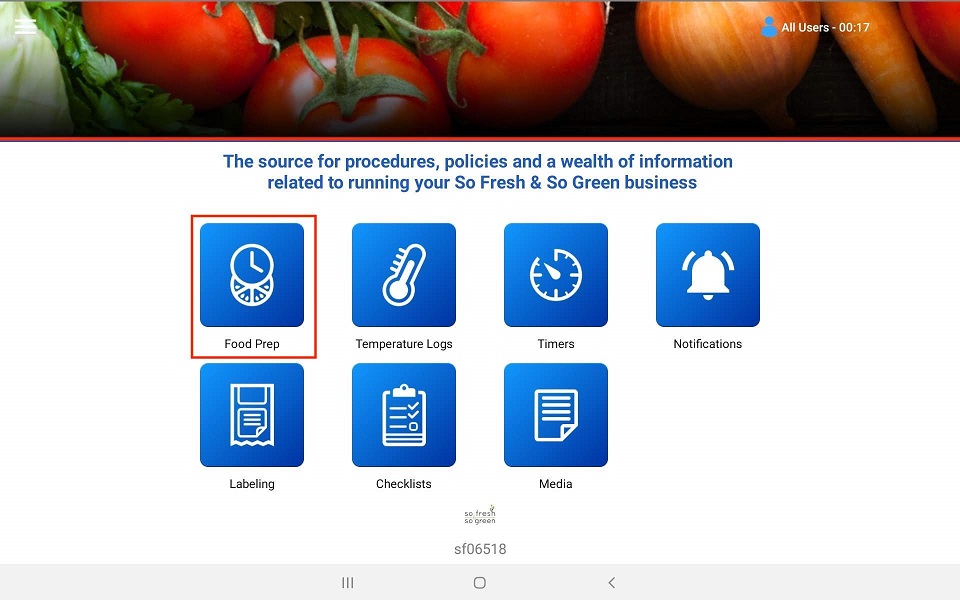
1. Select Food Prep.
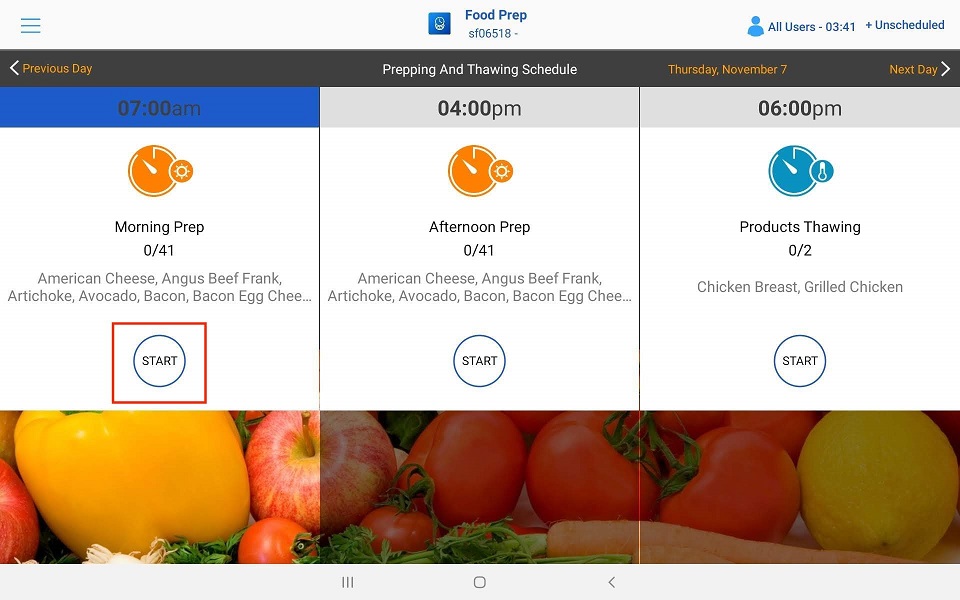
2. To start a prep session, select the proper session and hit start.
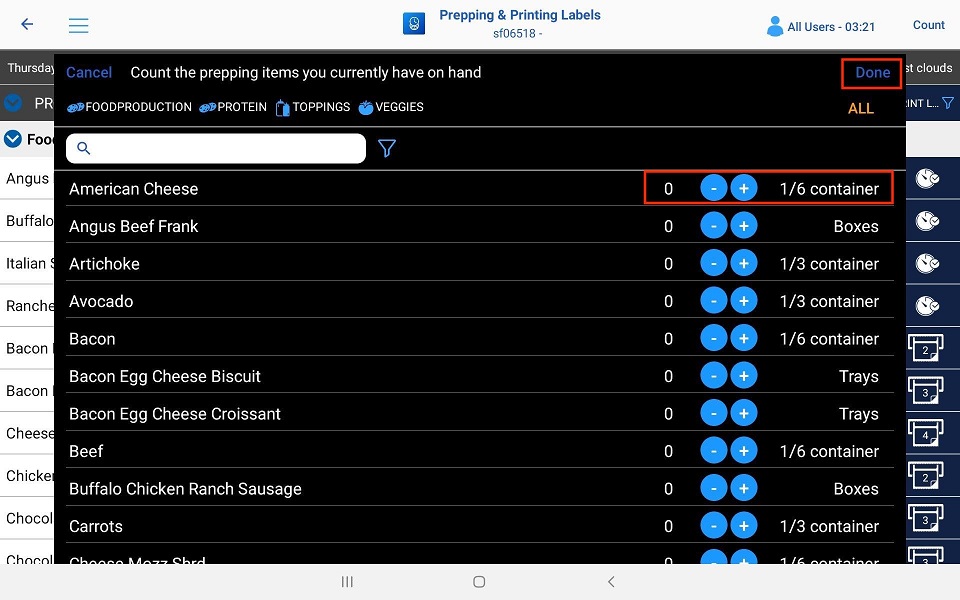
3. Before you start prepping, count the prepped items that haven’t expired by using the + or -. This will adjust your prepping quantities, so you don’t over prep an item. Select Done when finished.
4. The Products column will have the Items that need to be prepped broken up by category. You can search for a specific Item by using the search tool.
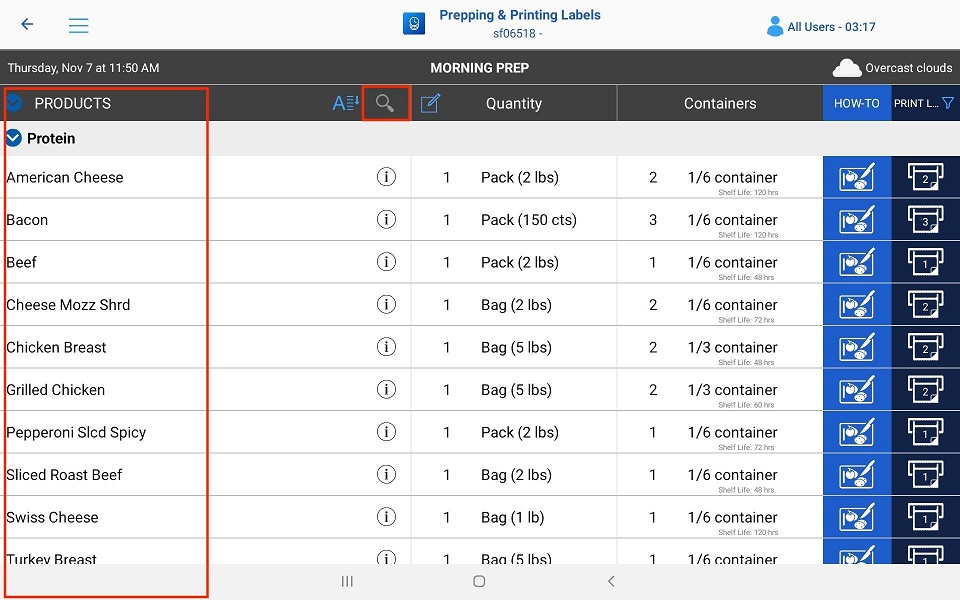
5. The Quantity column will show what size package the prepped item Is received as.
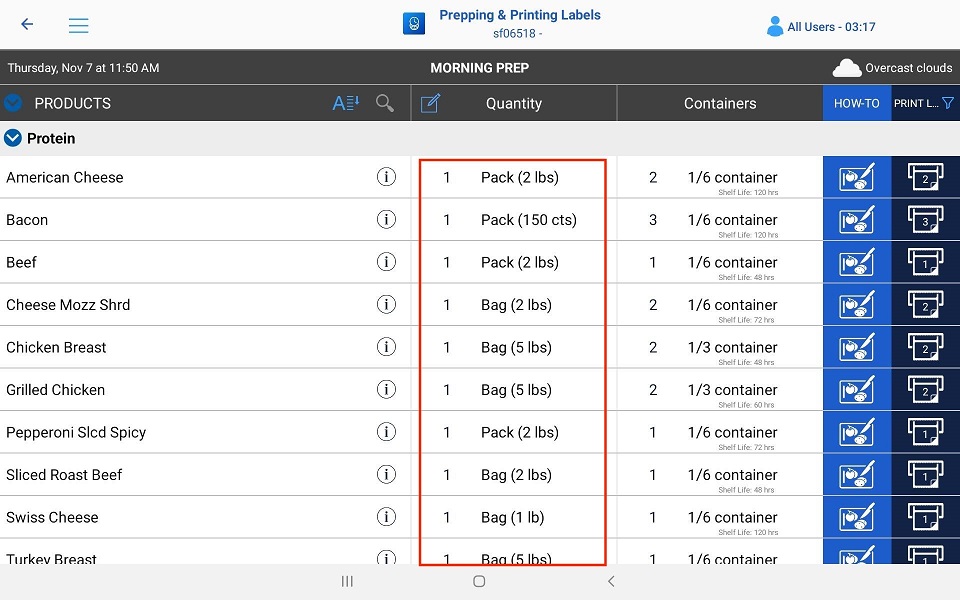
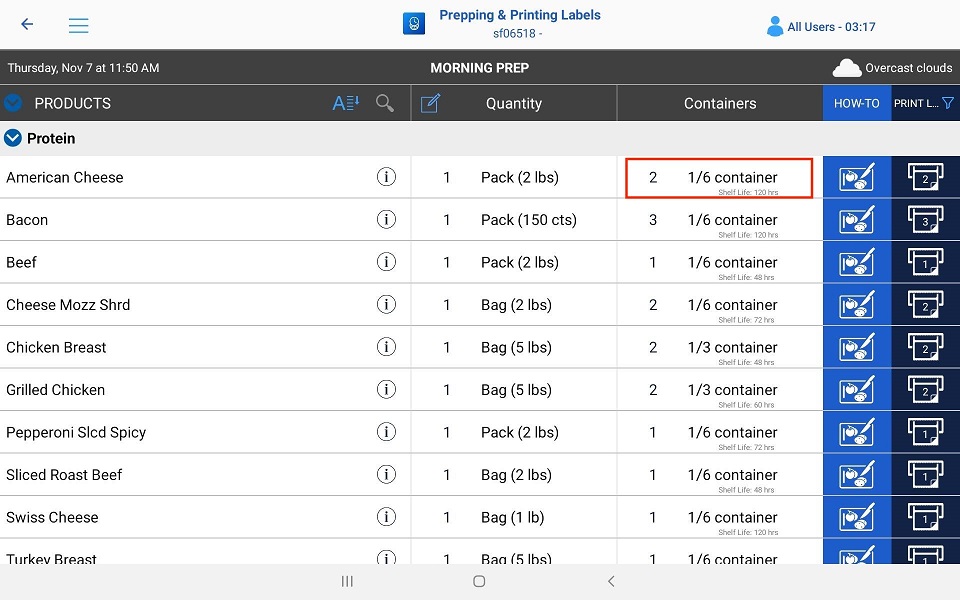
6. The Containers column shows what yield that Prepped Item should produce from the Quantity Column.
i. Example: American Cheese
1. This is received in on 2-pound bag (Quantity)
2. This produces when prepped is moved and stored in 2 sixth pans (Containers)
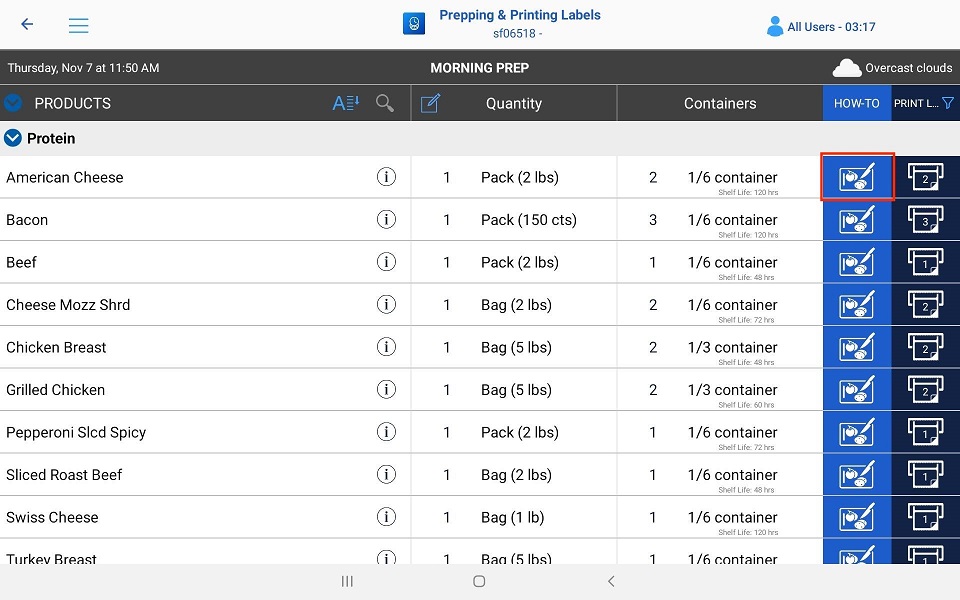
7. The How-To Column Is a link to a recipe card or description sheet for that prepped Item.
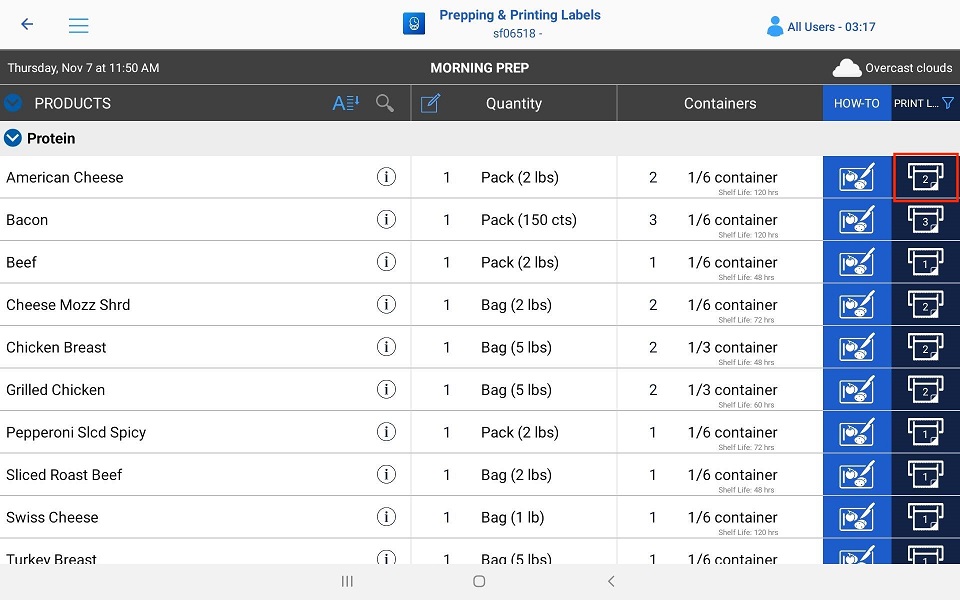
8. The Print label column will display the number of labels to print. This number should match the number of containers In the Container column and will change if there were prepped items already available.
9. There Is also a filter In this column to remove Items that have been completed. This way you will always see only what is left to be prepped for that session.
