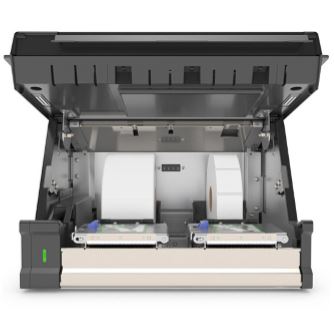
With your BOHA! Terminal powered on, grab hold of the two tabs at either side of the lower section of the display and pull up . The hinged display will make a click sound and you will be able to swivel the display up until it is parallel with your tabletop. The one or two label printer mechanisms and label buckets will be visible, depending on your configuration. The BOHA! Terminal uses thermal printing technology, so no ink or toner is required.
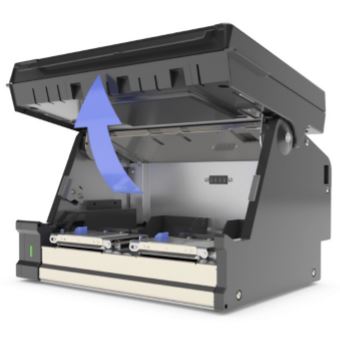
ft. The top of the printer mechanism will open.
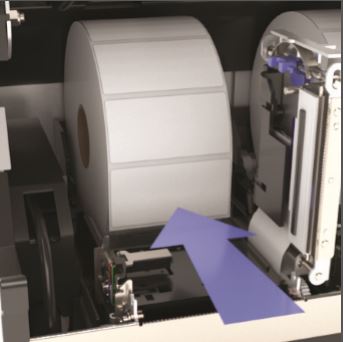
Both mechanisms can handle narrow and wide labels. In this example (your labels may differ in size or style) place the roll of 2 .2” x 2” labels into the left printer label bucket and then the 1 .2” x 1” labels in the right printer label bucket. Make sure the labels feed from the top.
Note: If unpacking the labels has resulted in any of the leading labels being pulled off the roll, leaving a blank space, trim the roll to eliminate the gap. Otherwise the gap from the missing label can cause your printer to stop printing, requiring you to re-set the label roll.
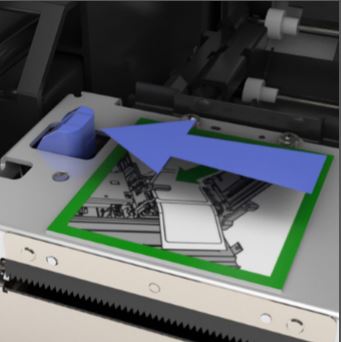
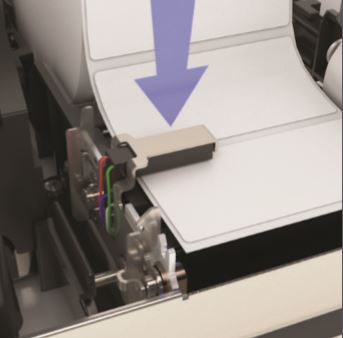
Next, thread the labels under the label sensor as shown below. Notice that the 1 .2” wide labels will slide only part of the way under the sensor because they need to remain centered with the roll, while the 2 .2” wide labels will slide all the way under the label sensor to the left edge.
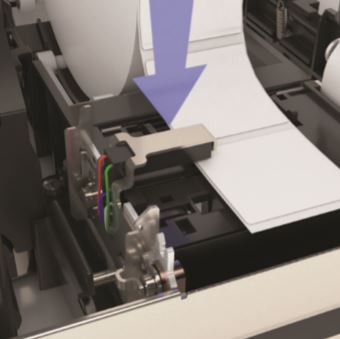
Then close the latch of the printer mechanisms. There will be some movement of the labels after you close the latch and the labels align for printing. Now you are ready to close the display. Rotate the hinged display down until it clicks to its closed position.